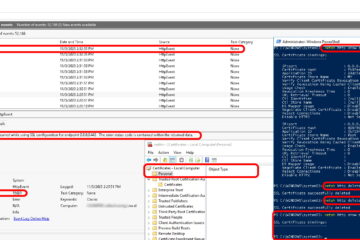
This is the shortest documentation I could create on how to inject drivers into Win PE2.0 (or Vista WIM file). The screenshot beside STEP 5 displays the 3 critical commands I used to load nVidia nForce 4 ethernet drivers to my WinPE boot.wim.
- Create a folder called C:\TEMP. Then create two subfolders; one called DRIVERS and the other called MOUNT
- Insert your Windows Vista DVD/CD, and copy DRIVE:\SOURCES\BOOT.WIM to C:\TEMP\ and rename it CUSTOMBOOT.WIM
- Download the drivers you need and put them in their own subfolder under C:\TEMP\DRIVERS (i.e. C:\TEMP\DRIVERS\ETHERNET\ and C:\TEMP\DRIVERS\SOUND\ ) .
- Don’t put the driver .EXE file into that folder, you need to expand that .EXE and get the driver files out of it.
- WinRAR and WinZIP work well for extracting .EXE files containing drivers. For WinZip you simply drag the .EXE with the RIGHT MOUSE a few pixels and you will see WINZIP, EXTRACT TO… in the context menu.
- Make sure you do not change the folder structure your driver .EXE file may have created.
- Use Vista (or at least WinXP drivers); DOS drivers will NOT work.
- Click Start. Microsoft Windows AIK, Windows PE Tools Command Prompt. This assumes you have the Windows Automated Installation Kit installed. UPDATE: DEC 2008 – Click HERE to download the new Microsoft Desktop Deployment Toolkit.
- This will set a pile of software (i.e. imagex) in your “PATH” so you won’t have to search for it.
- Mount (i.e. expand) CUSTOMBOOT.WIM with the following command:
- imagex /mountrw C:\Temp\customboot.wim 2 C:\Temp\Mount
- NOTE: if you are working with a Vista image (i.e. not PE2.0) then change the number to from a 2 to a 1
- Inject your drivers using the following command:
- peimg /inf=C:\Temp\Driver\FOLDER\*.inf /image=C:\Temp\Mount
- be sure to replace the word “FOLDER” with the name of the folder. For example:
- peimg /inf=C:\Temp\Driver\ETHERNET\*.inf /image=C:\Temp\Mount
- You will receive the following error if you do not enter the correct path
PEIMG failed to complete the operation with status code 0x8007000
- Commit your update and recompress your updated image using the following command:
- imagex /unmount /commit C:\Temp\Mount
- Congratulations you are done! If you want to push this to a Windows Deployment Services (WDS) Server read on.
- Start your WDS Console, right click on the boot image you wish to update, and select DISABLE
- Right Click on that same boot image and select REPLACE IMAGE. The browse to wherever you have your CUSTOMBOOT.WIM and select it.
- in my case I copied CUSTOMBOOT.WIM across the network from the VM I created it on to my W2003 WDS server prior to the REPLACE IMAGE STEP
- this process will update the existing BOOT.WIM and REENABLE it. There is no need restart services
- You could delete your CUSTOMBOOT.WIM but I keep mine in case I want to add more drivers in the future.
Much of the above article was based on THIS article which you may find useful if you have further questions.


2 Comments
SOLVED: How to Add Drivers in WDS Windows Deployment Services - Up & Running Technologies, Tech How To's · October 1, 2018 at 1:41 pm
[…] Vista: how-to-inject-drivers-into-windows-pe-2-0-in-5-minutes-or-into-a-windows-vista-image […]
SOLVED: How to Add Drivers in WDS Windows Deployment Services - Up & Running Technologies Calgary · March 12, 2014 at 2:19 pm
[…] Vista: how-to-inject-drivers-into-windows-pe-2-0-in-5-minutes-or-into-a-windows-vista-image […]